Please follow the steps below:
-
Prerequisites
-
You need an active PencilPay account. If you don’t have one, please go to Onboard Customers, Save Time and Get Paid Faster | PencilPay and register for a 30 day trial. Alternatively contact us via email at support@pencilpay.com and we’ll arrange a 20 minute demo of PencilPay.
-
You need an active Xero account that is integrated with PencilPay. If you don’t have a Xero account, please go to Try Xero for Free and sign up for a free 30 day account.
-
An active Wordpress and WooCommerce site that is in production mode as this extension is connected to our production environment. If you would like to test the extension and features on a development environment, please email support@pencilpay.com and we’ll arrange a time to demo Pencil and, if required, provide you with access to a demo environment for testing.
-
-
Installation Method
-
Plugin Installation (upload zip plugin)
-
In Wordpress, go to Plugins -> click “Add New” -> choose the PencilPay WooCommerce plugin zip file from your computer and click “Install Now”.
-
Plugin Installation (via FTP or console)
-
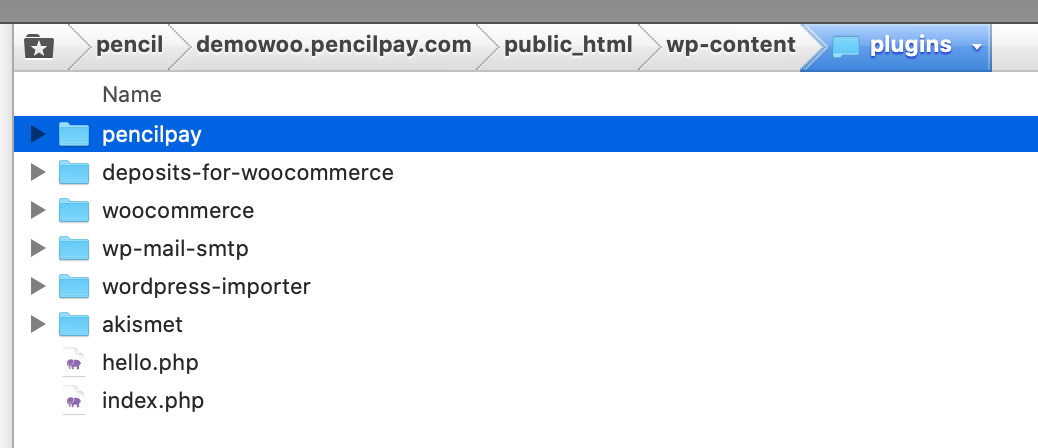
Extract the plugin package and upload to your-wordpress/wp-content/plugin/
-
-
-
-
Activate the plugin at Admin Dashboard -> Plugins -> Installed Plugins -> WooCommerce PencilPay Payment Gateway

-
PencilPay Configuration
-
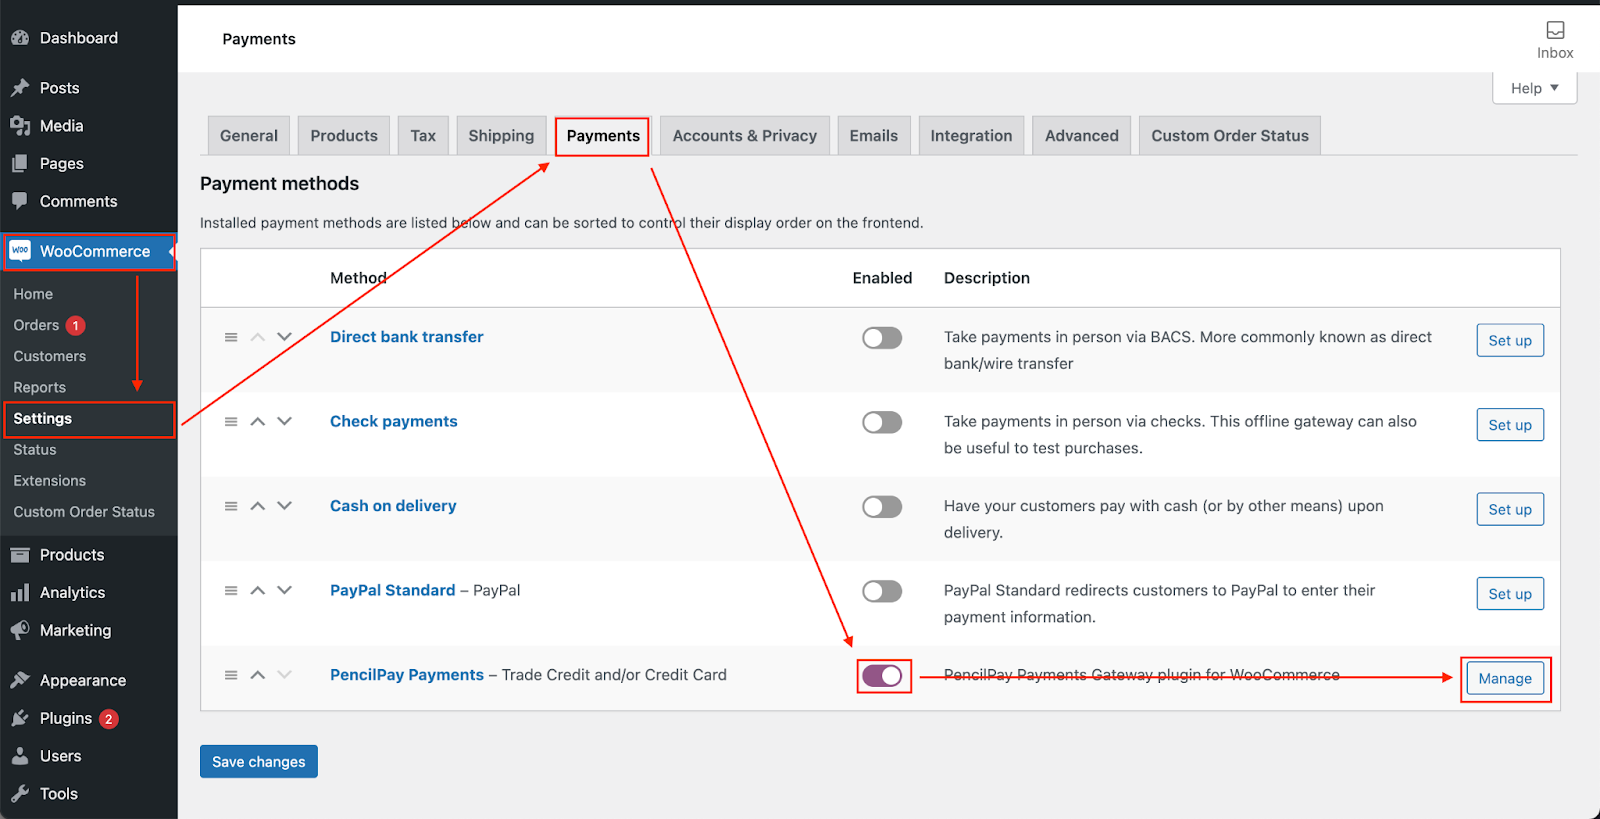
The settings in Admin Dashboard -> WooCommerce -> Settings -> Payments
-
Enable the method
-
Click on Manage button to update the settings by following the instructions
-
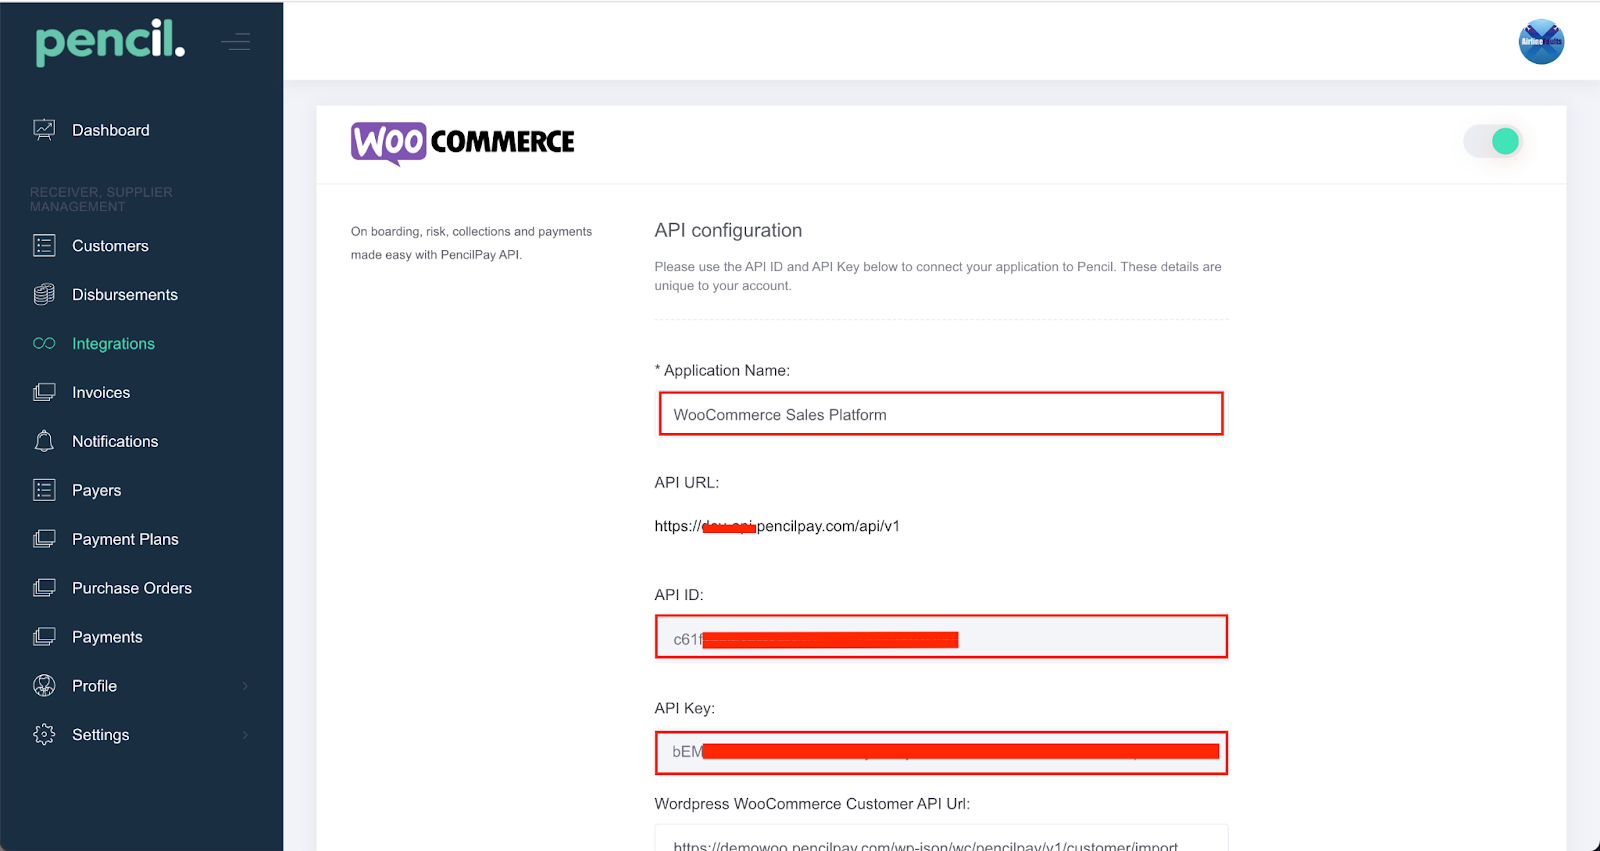
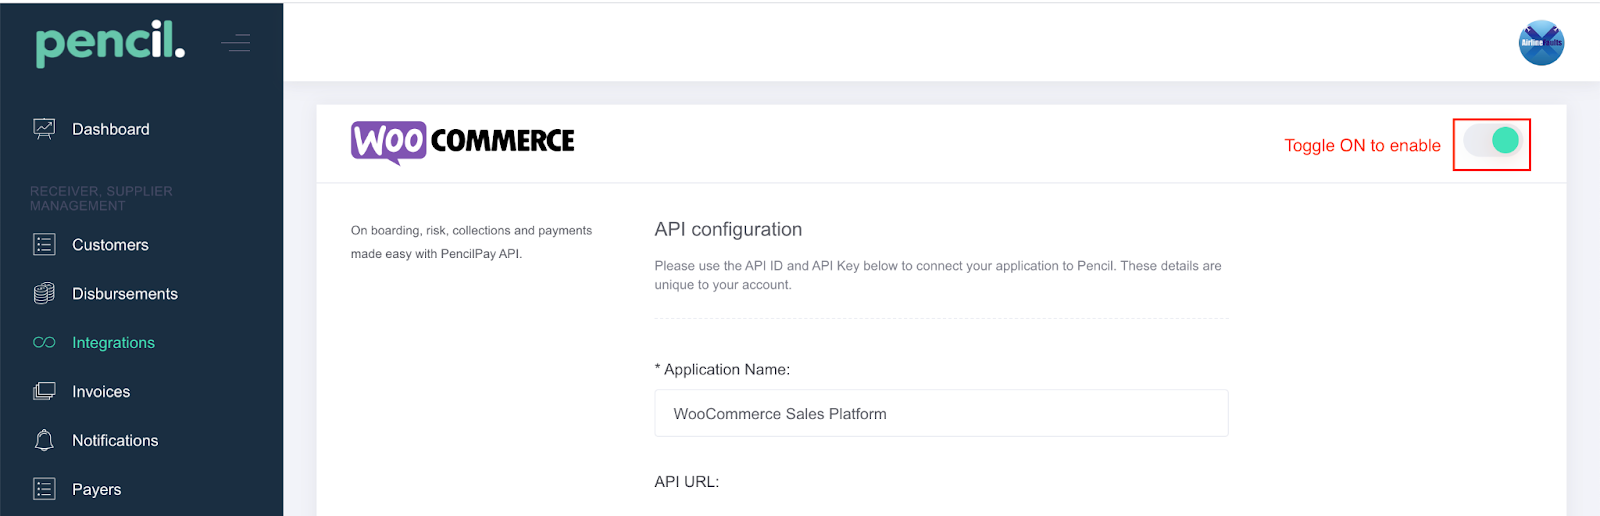
In a separate tab, login to PencilPay -> Integrations -> WooCommerce -> so you can get PencilPay API details
-
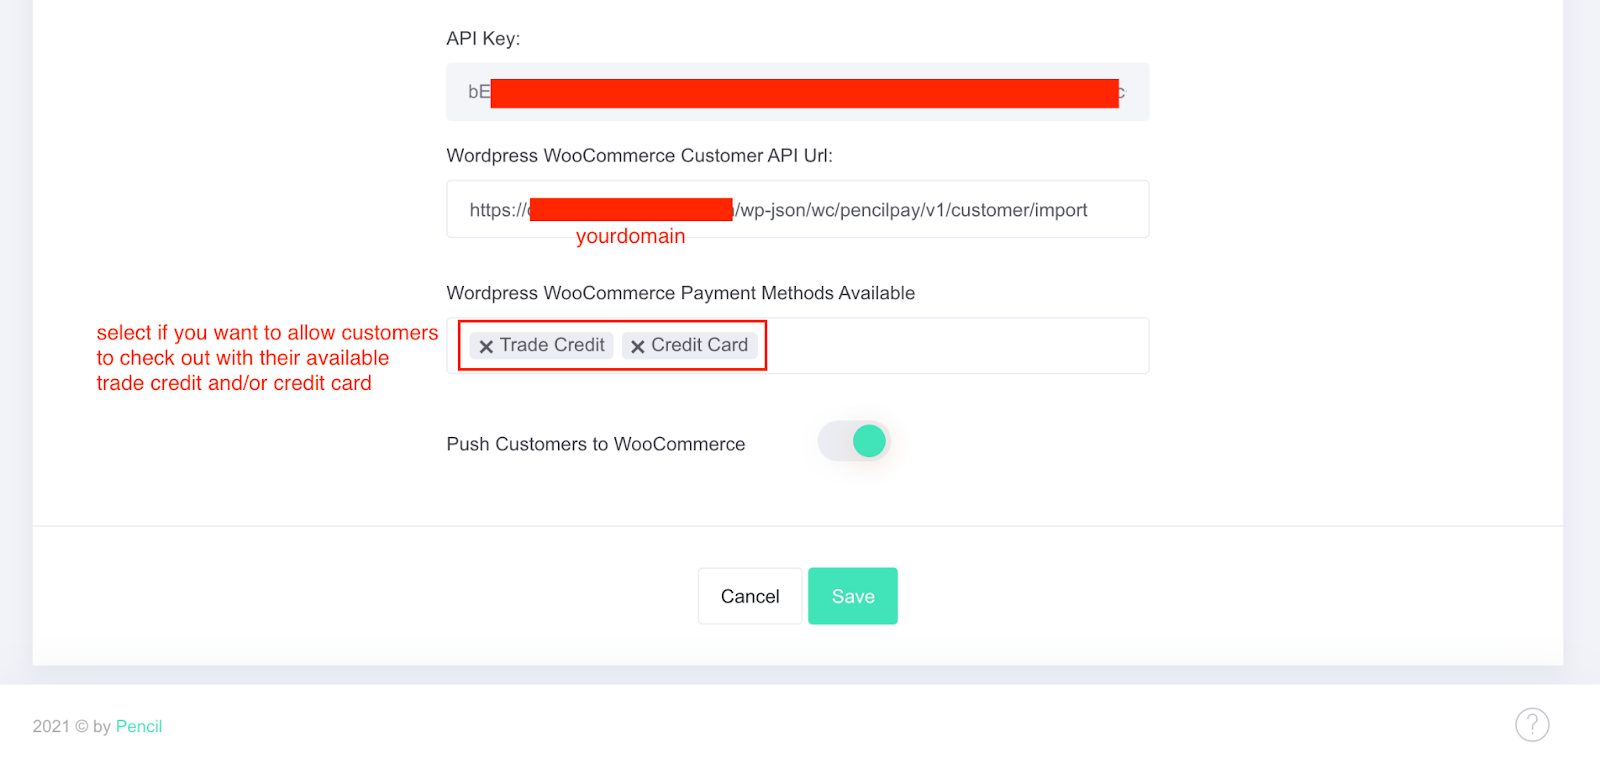
Update Customer import endpoint
https://your-wordpress-website/wp-json/wc/pencilpay/v1/customer/import -
Copy these from Pencil to enter into your WooCommerce settings:
-
API Endpoint Url for production mode: https://api.pencilpay.com/api/v1
-
PencilPay API ID
-
PencilPay API Key
-
-
In “Wordpress WooCommerce Payment Methods Available” click in here and select if you want your customers to checkout using their available trade credit limit and/or credit card.
-
If you don’t want your B2B customers to be pushed to WooCommerce when you approve their credit application in Pencil, toggle “Push Customers to WooCommerce” off, otherwise toggle on.
- Enable Credit Card Pre-Authorisation: enable this if you want to pre-authorise payments.
- Instant Payment Notifications Url: enter https://your-wordpress-website/wp-json/wc/pencilpay/v1/purchase-order/payment-status
-
Click on the Save button in your Pencil account.
-
In the top right corner toggle WooCommerce ON.
-
-
Next go back to the WooCommer tab and paste the settings from: API Endpoint Url for production mode, PencilPay API ID and the PencilPay API Key in their related fields.
-
Xero Contact -> check the “Enable” box.
-
PencilPay Payment Confirmation page -> set as “PencilPay Payment Gateway”
-
PencilPay Order Payment Complete -> set as “PencilPay Order Payment Complete”
-
PencilPay Order Payment Cancel -> if an order is cancelled on the payment page, we will redirect back to this page. We suggest selecting “Cart”.
-
Click on “Save Changes”
-