![200707 pencil-logo-white-green-white_background-square.png]](https://support.pencilpay.com/hs-fs/hubfs/200707%20pencil-logo-white-green-white_background-square.png?width=150&height=53&name=200707%20pencil-logo-white-green-white_background-square.png)
- Install latest Pencil customisation package for MYOB Acumatica
- Download latest customisation package
- Login to Pencil as supplier
- Download customisation package file URL:
https://app.p encilpay.com/integrations/myob/myob_advanced/download_package_file
- Import customisation package to MYOB Acumatica account:
- Login to MYOB Acumatica using full access user account
- Go to
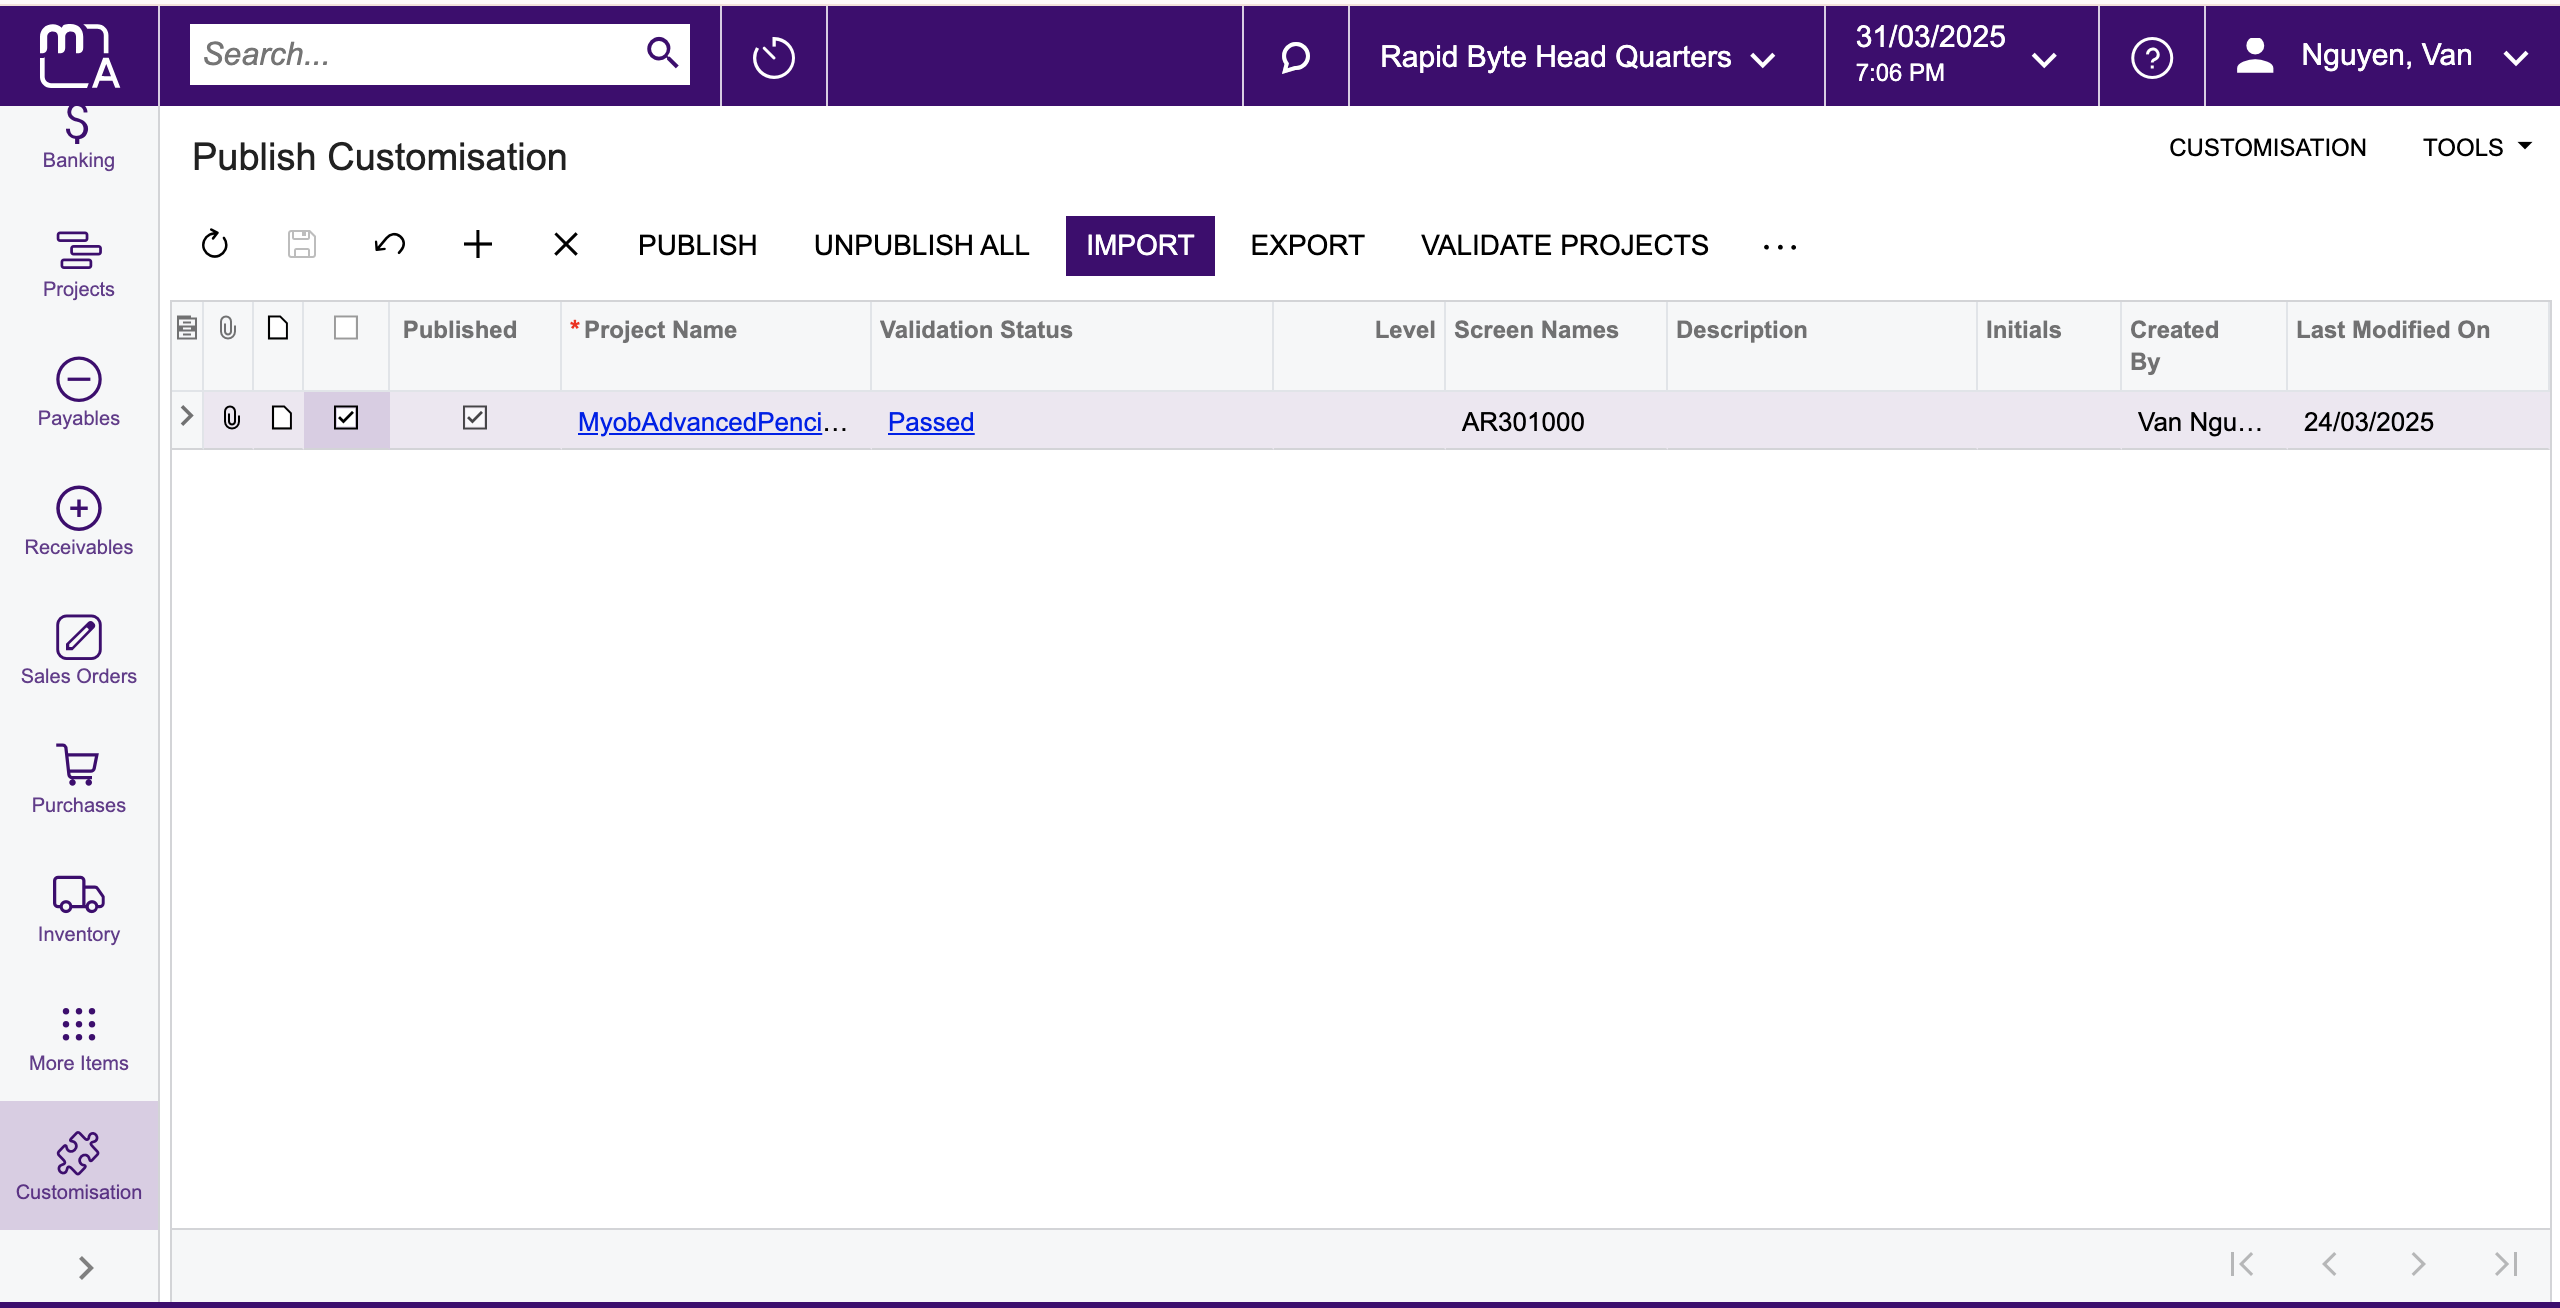
Customisation→Publish Customisation - Click
IMPORTbutton →Choose File→ Select the customisation package file downloaded at step 1.a.ii → ClickUPLOAD
- Publish the latest customisation
- Click on the project name of the newly uploaded customisation at step 1.b.iii
- Click
Publishbutton → Click onPublish Current Projectaction.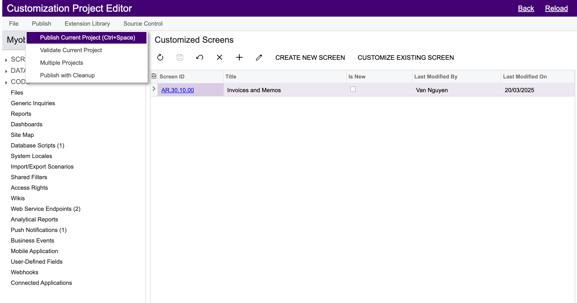
- Download latest customisation package
- Update Invoice report - Screen AR641000
- Download and install Acumatica Report Designer
- Add Pencil payment link to Invoice report - Screen AR641000
- Open Acumatica Report Designer
- Click
File→Open From Server- Fill in the required information:
- Web service URL
- Login user details with Report Designer role
- Click
Load reports listbutton - Select AR641000 report
- Click
OKbutton
- Fill in the required information:
- Add controls for Pencil payment link which can be added to the report as a button, a link or a QR code:
Pay with PencilPaybutton (recommended):- Download
pay_with_pencilpay.pngfile: [URL will be updated soon]

- On the
Propertiestab of the Properties pane, select thereport1 Reportobject from the drop-down list to select the report form, and do the following:- In the
Data > EmbeddedImagesproperty, click the More button to open theEmbedded Imagesdialog box. - In the dialog box, click the
New image ...button, select thepay_with_pencilpay.pngfile. - Click
OKbutton to close theEmbedded Imagesdialog box.
- In the
- Add a
TextBoxcontrol to the position you want to show thePay with PencilPaybutton. - Properties:
- Appearance → Style → BackImage → Source:
Embedded - Appearance → Style → BackImage → Image:
pay_with_pencilpay - Behavior → NavigateUrl:
=[ARInvoice.UsrPencilPaymentLinkUrl] - Behavior → Target:
_blank - Behavior → Visible:
False - Behavior → VisibleExpr:
=[ARInvoice.UsrPencilPaymentLinkUrl] <> null AND [ARInvoice.OpenDoc] AND [ARInvoice.Status] = 'N' - Layout → Size (optional):
160px, 40px
- Appearance → Style → BackImage → Source:
- Download
- QR code:
- Add a
PictureBoxcontrol to the position you want to show the QR code for Pencil payment link on the report. - Data → Source:
Barcode - Data → BarcodeType:
QRCode - Data → Value:
=[ARInvoice.UsrPencilPaymentLinkUrl] - Behavior → QRCodeSettings → CodeSize:
64 - Behavior → Visible:
False - Behavior → VisibleExpr:
=[ARInvoice.UsrPencilPaymentLinkUrl] <> null AND [ARInvoice.OpenDoc] AND [ARInvoice.Status] = 'N' - Layout → Size:
64px, 64px
- Add a
Pay with PencilPaylink:- Add a
TextBoxcontrol to the position you want to show thePay with PencilPaylink. - Properties:
- Appearance → Value:
Pay with PencilPay - Appearance → Font (optional):
Arial; 12px; - Appearance → TextAlign (optional):
Center - Appearance → VerticalAlign (optional):
Top - Behavior → NavigateUrl:
=[ARInvoice.UsrPencilPaymentLinkUrl] - Behavior → Target:
_blank - Behavior → Visible:
False - Behavior → VisibleExpr:
=[ARInvoice.UsrPencilPaymentLinkUrl] <> null AND [ARInvoice.OpenDoc] AND [ARInvoice.Status] = 'N' - Layout → Size (optional):
128px, 16px
- Appearance → Value:
- Add a
- Click
File→Save To Server- Fill in required information
- Web service URL
- Login user details with Report Designer role
- Click
OKbutton
- Fill in required information
- Test
- Login to MYOB Acumatica
- Go to
Invoices and Memos - Create and release a new invoice
- Open the newly created invoice
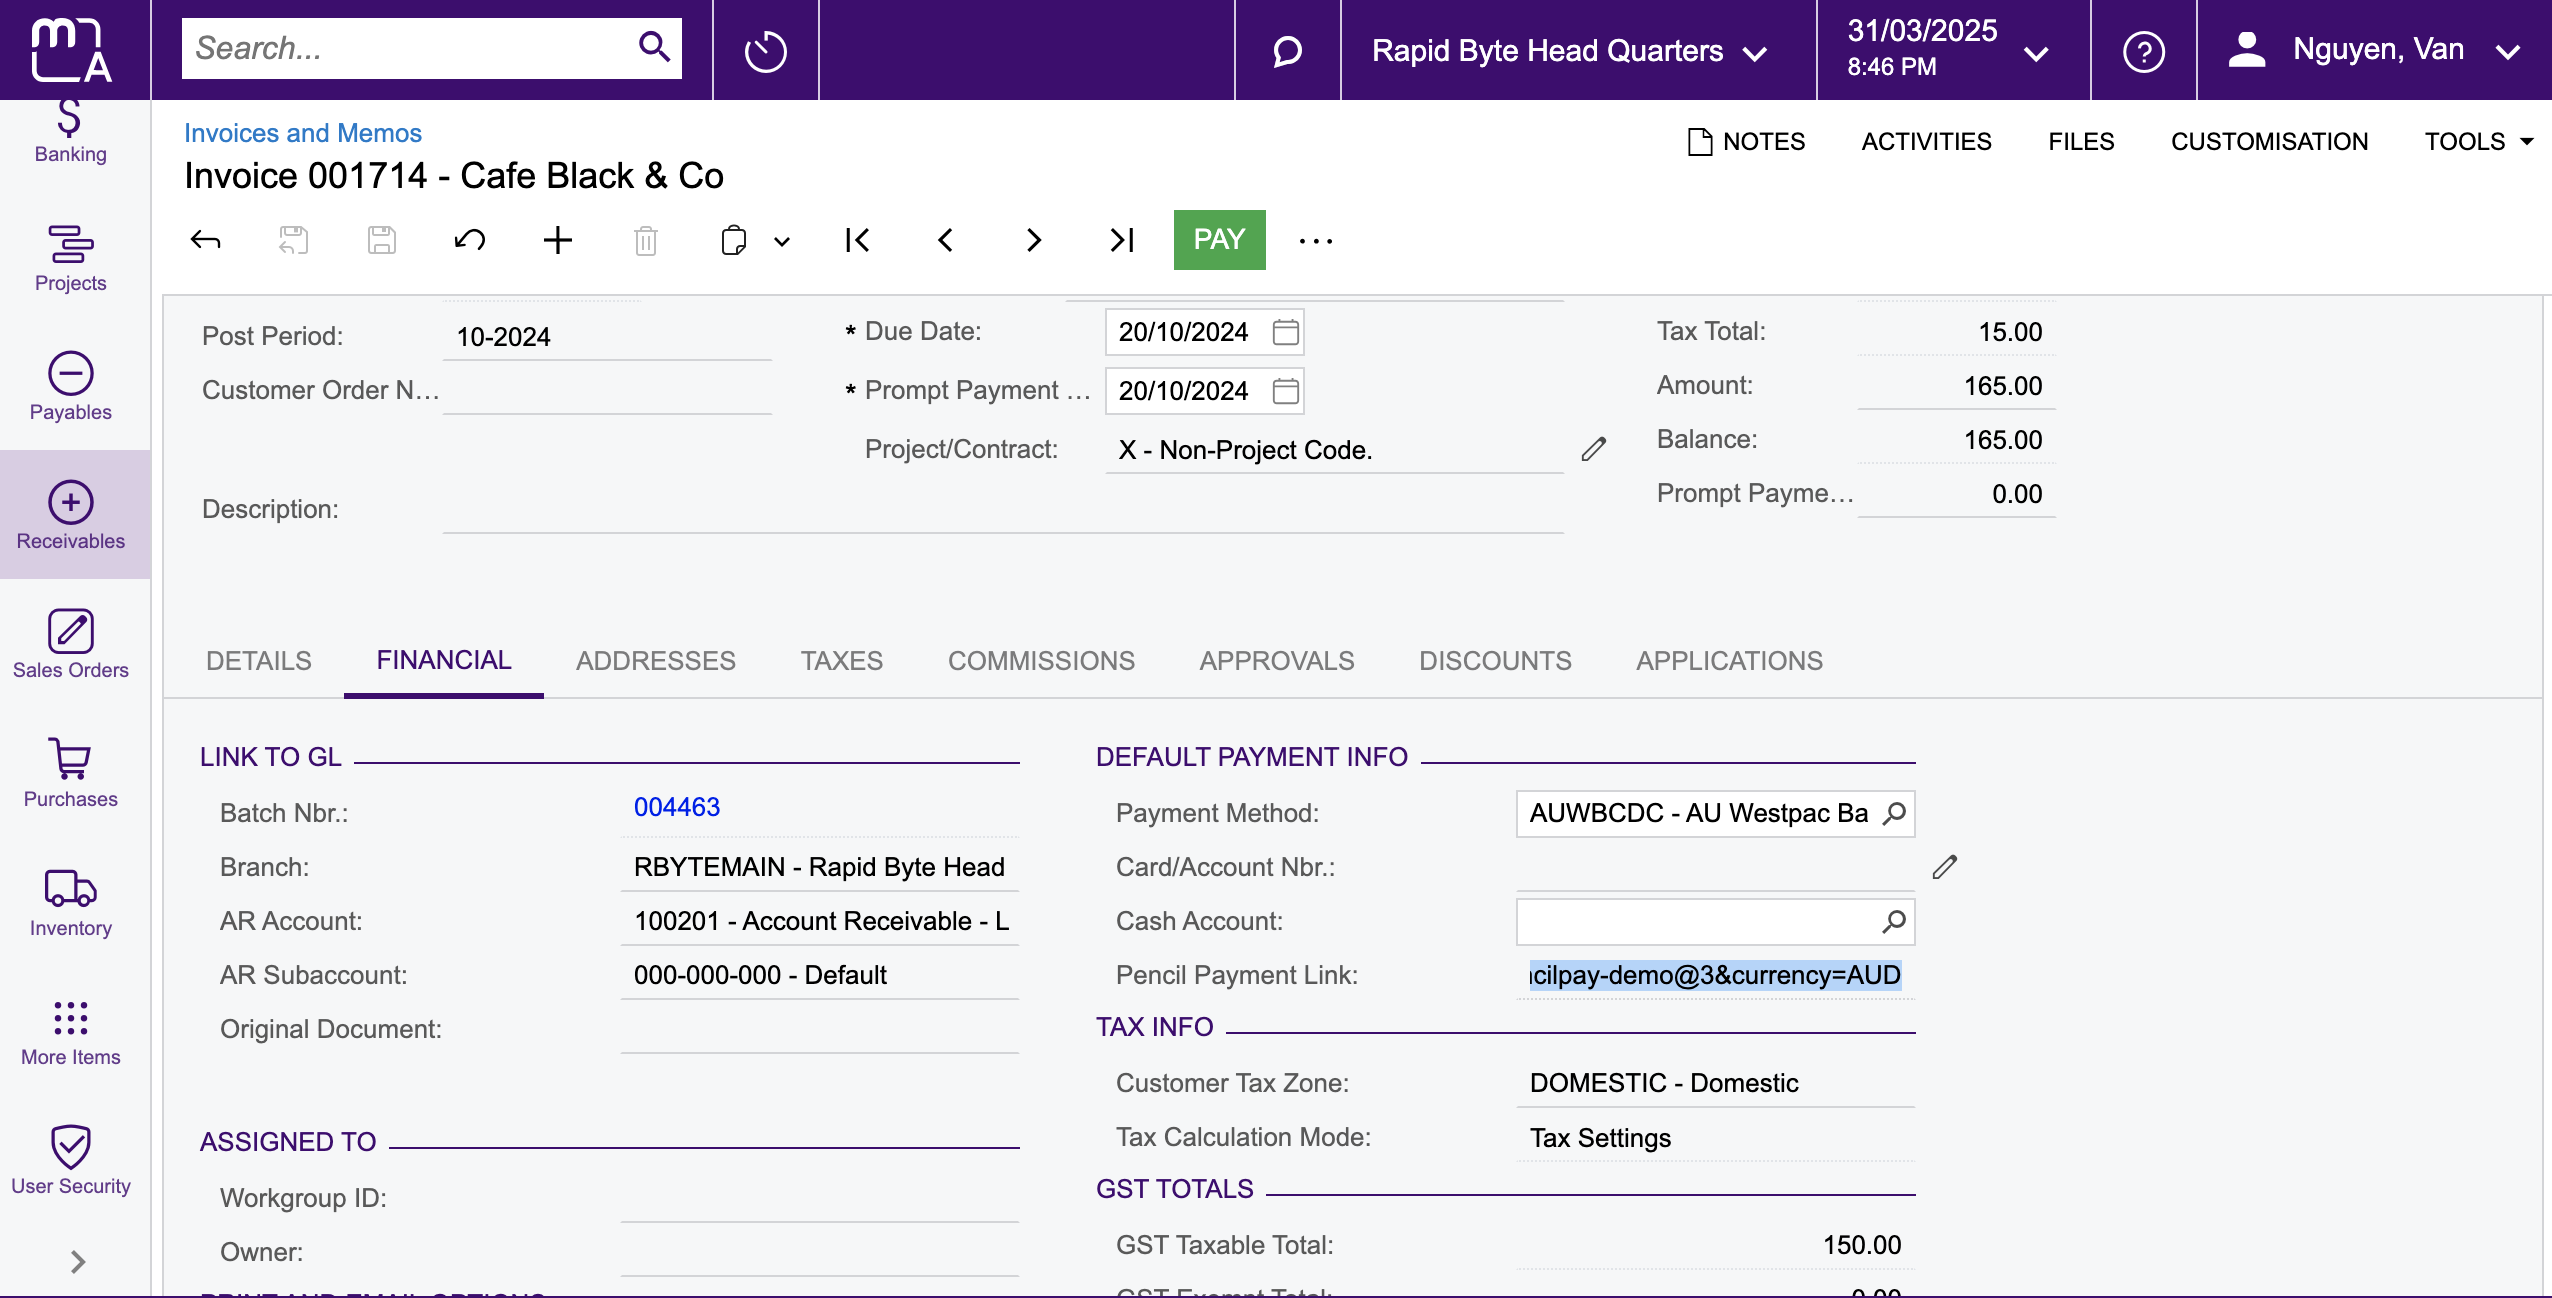
- Select
FINANCIALtab - The
Pencil Payment Linkinput is located underDEFAULT PAYMENT INFOsection
- Select
- Click
Printaction (in more actions...) to open AR641000 screen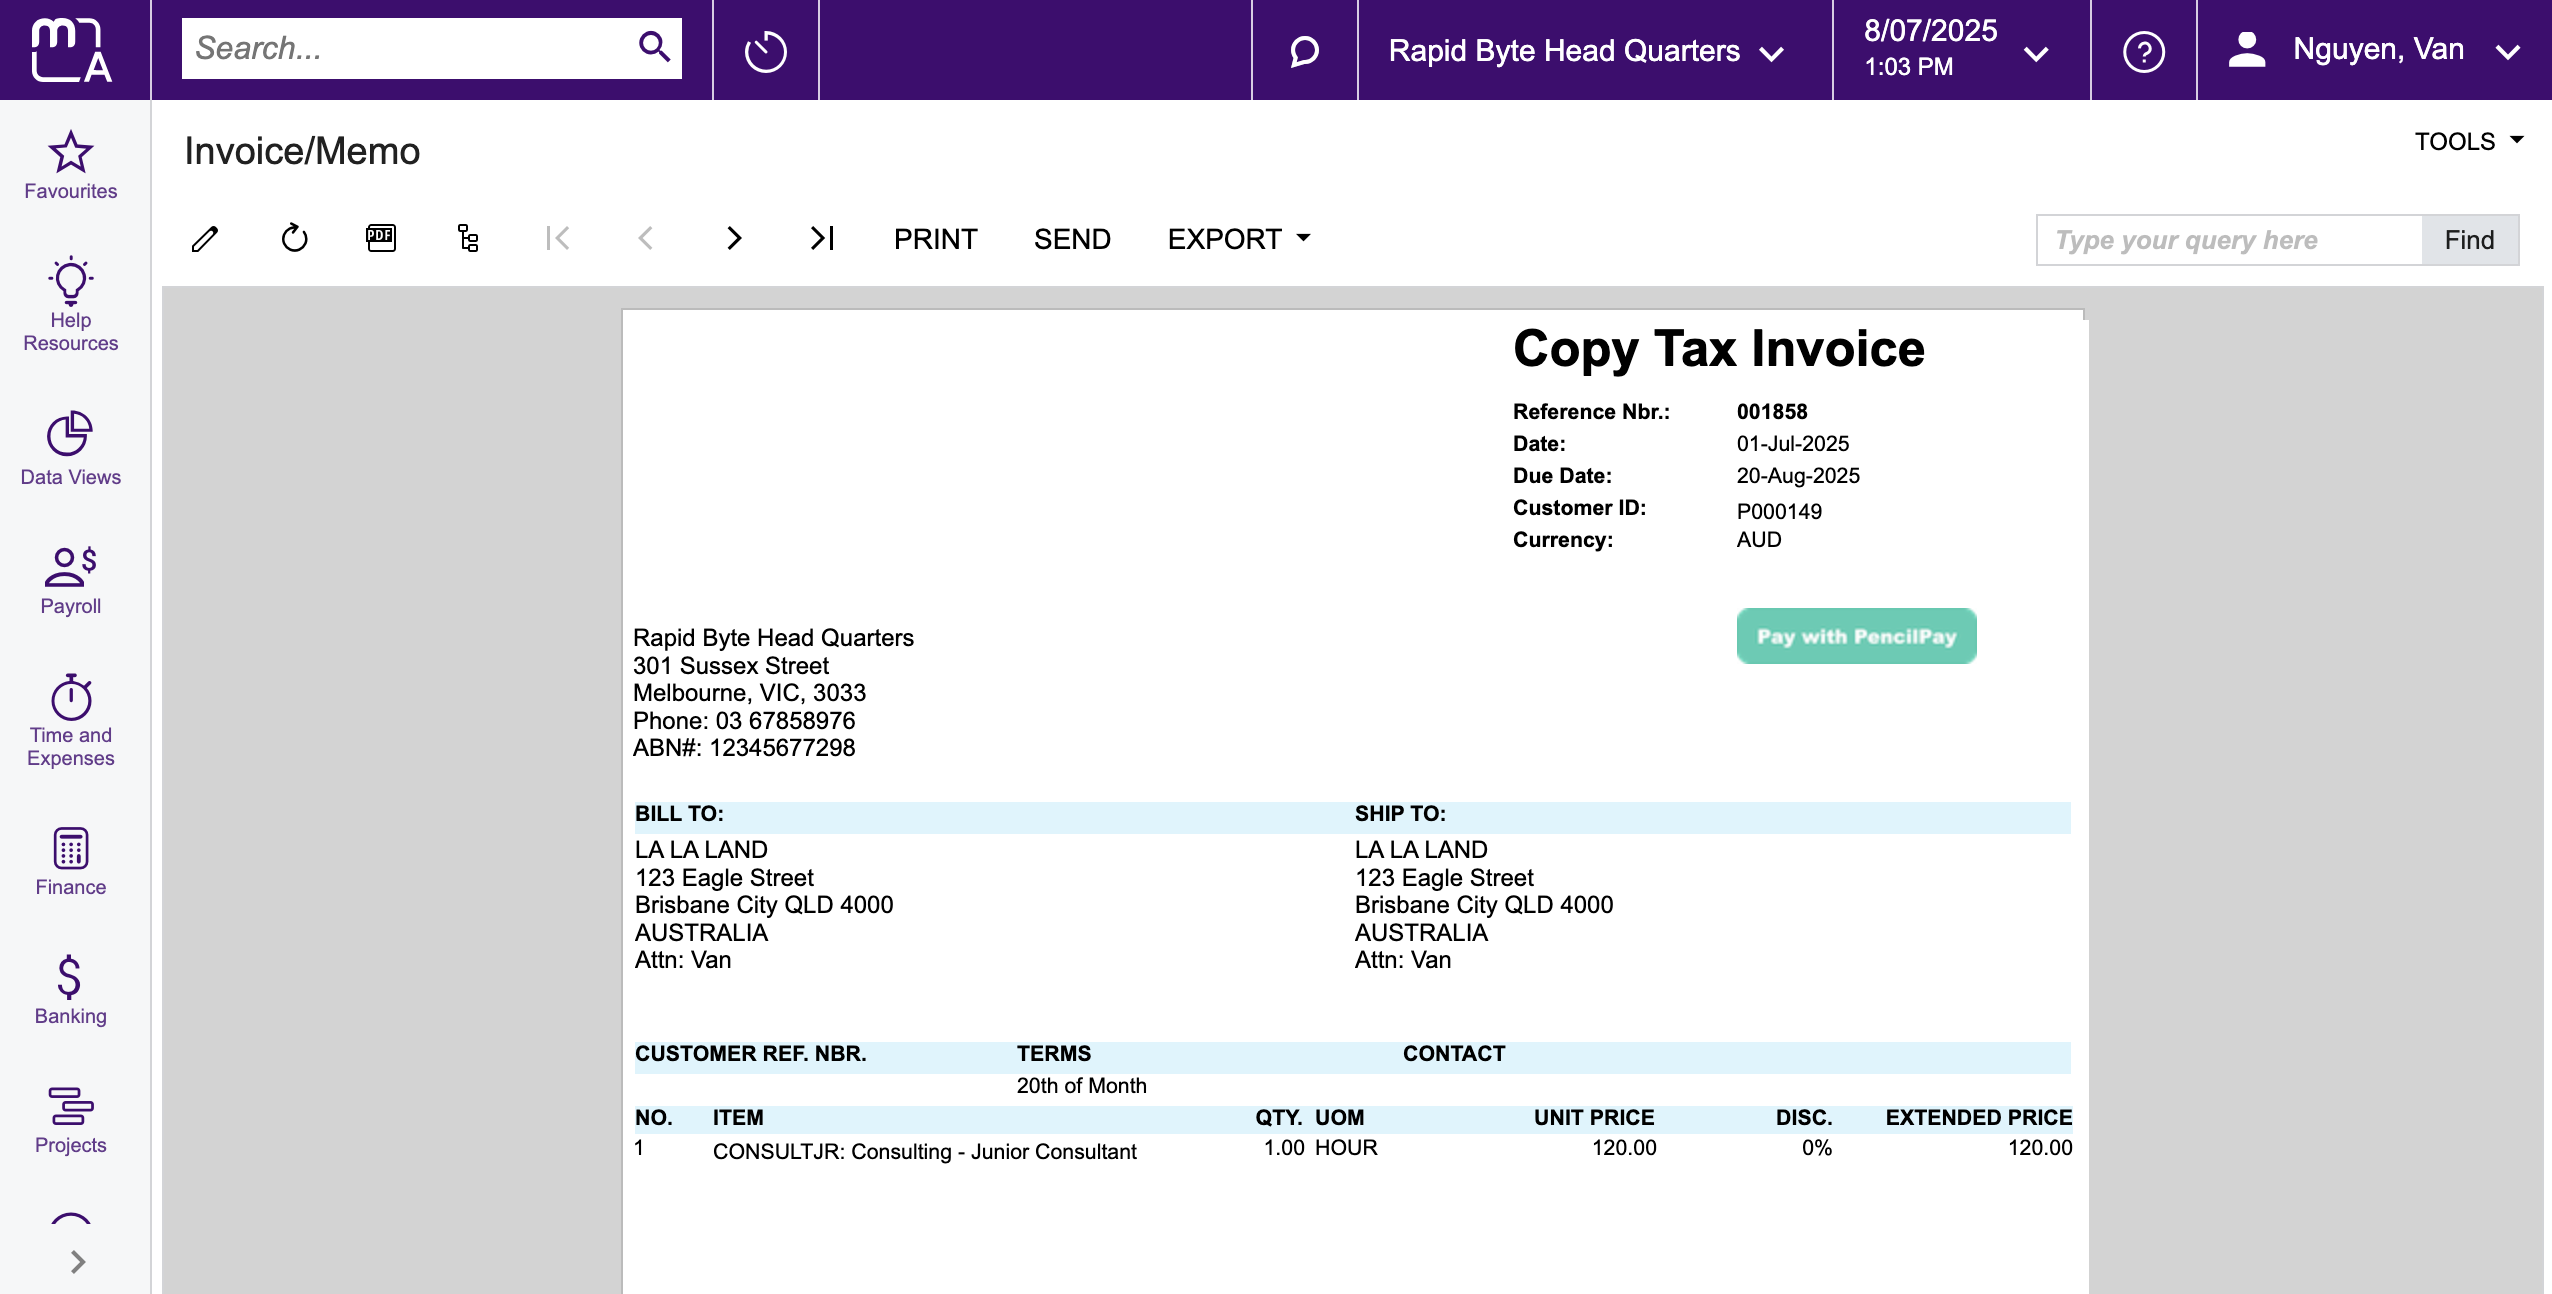
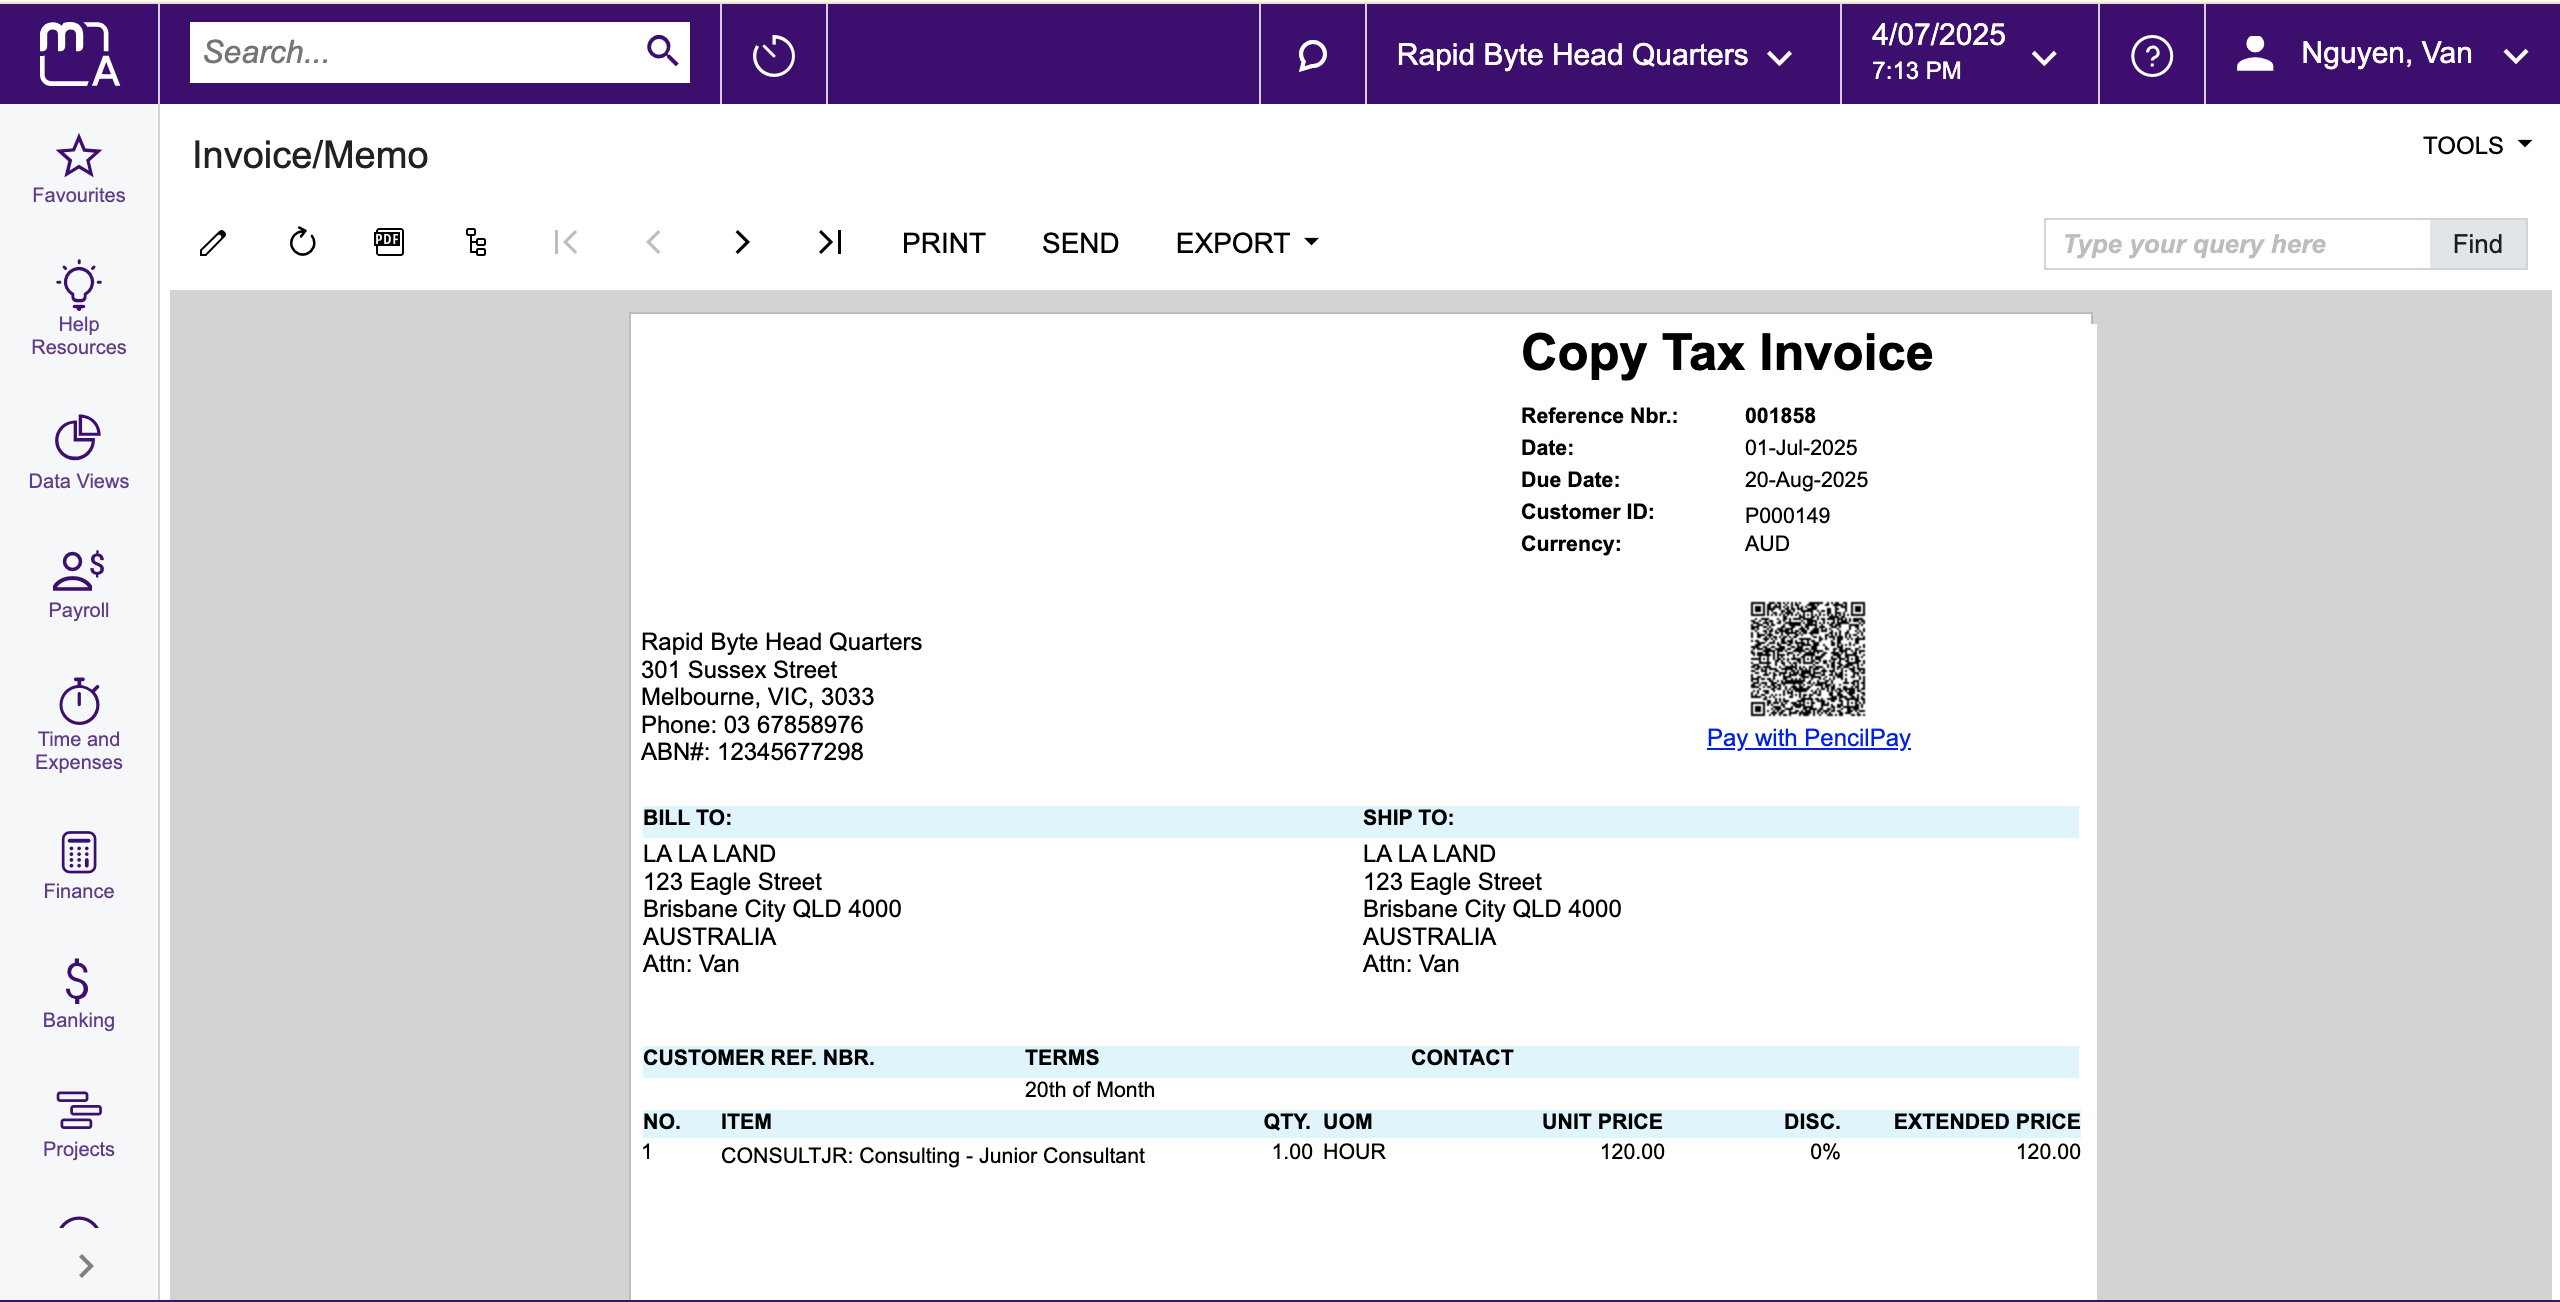
- Click on Pencil Payment Link (
Pay with PencilPay) added at step 2.b.iii
- Update Invoice email template
AR Invoice- Login to MYOB Acumatica account
- Go to
Email Templates- Screen ID SM2040PL - Find and open
AR Invoicetemplate - Add
((Document.UsrPencilPaymentLinkUrl))variable where you want to show the Pencil Payment Link in the email content - Click
Savebutton to save the change - Test
- Go to
Invoices and Memos - Select an
Openinvoice - Click on
Send Emailaction (in more actions...) - Click
SELECT TEMPLATEbutton → selectAR Invoicetemplate - Fill in required information
- From
- To
- Subject
- Double check the Pencil payment link added at step 3.d is included in the email content
- Click
SENDbutton
- Go to